
Spring is approaching and I’m looking forward to it for many reasons. For one, I’ll be nother year older this month, which is a personal gratitude for me without all the bells and whistles. Since I didn’t post in this series for the Winter season, I wanted to come back strong for Spring instead. It’s obvious that chevron nails have been pretty hot lately. I decided to create this DIY mint chevron manicure for all of my nail art lovers. Check it out…If you’ve followed me recently in my previous tutorials, you already know the routine. I tend to go for gel manicures with UV curing vs traditional top coats and long dry times. This mint chevron manicure can also be used to achieve a half moon manicure. To achieve this look or similar, you will need:
- UV Lamp – Check It Out
- (1) Base Coat (Gel or Traditional)
- (2) Two Solid Polish Colors
- (1) Glitter Polish Color
- (1) Polish Color w/Striper
- Nail Art Rhinestones
- Gel Top Coat
- Dotting Tool
- (2) Cleansing Pads
- Gel Cleanser or Isopropyl Alcohol
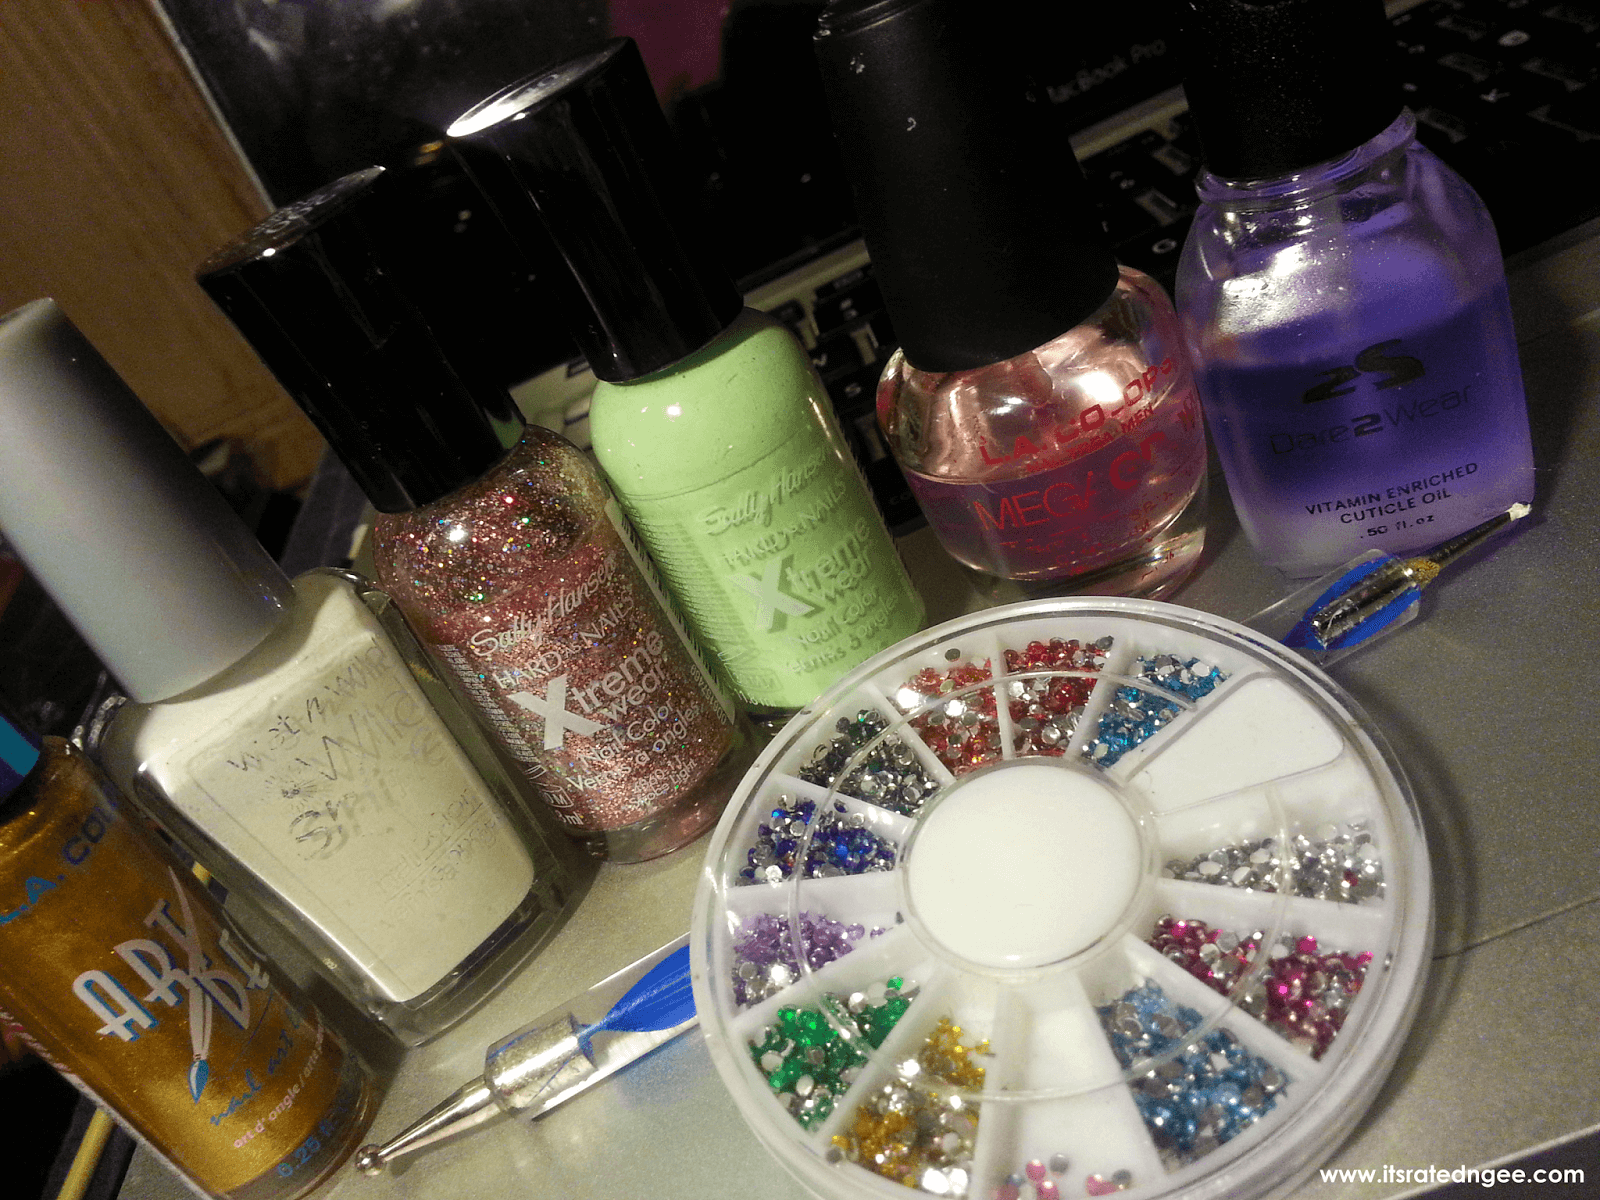
Colors (From Left To Right): LA Colors Art Deco “Gold Rush”, WetnWild WildShine “449C”, Sally Hansen Xtreme Wear “200 Strobe Light”, Sally Hansen Xtreme Wear “340 Mint Sorbet”, LA Colors Mega Grow Nail Treatment, and Dare2Wear Vitamin Enriched Cuticle Oil.
Step 1 – Apply MegaGrow to clean and dehydrated nails.
Step 2 – Apply and evenly coat “Mint Sorbet” to nails.
Step 3 – Let dry under UV or air dry after second coat.
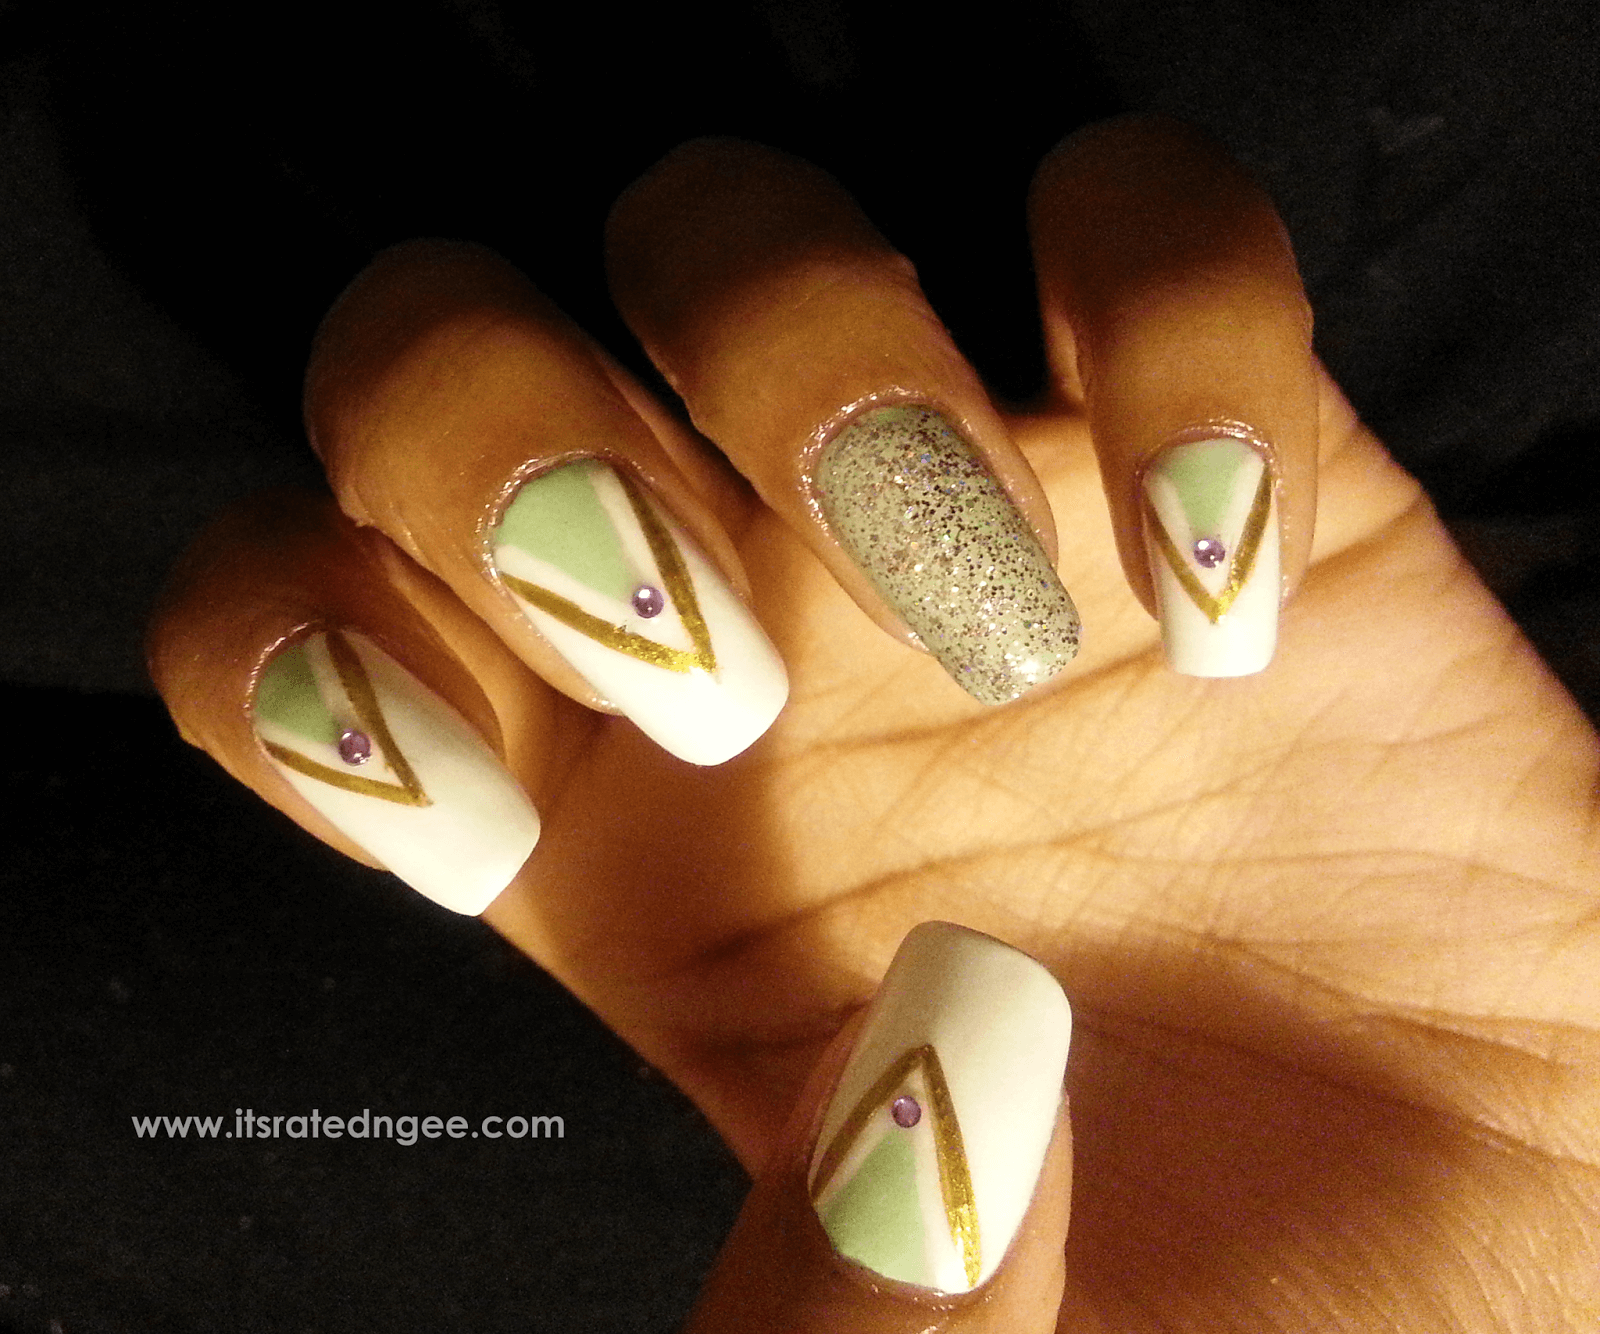
Step 4 – (Optional) If needed, create outlines on top of mint color of your chevron pattern in “449C” before painting. Do this for all except whichever two nails of your choice (which will remain minty).
Step 5 – Apply 1-2 coats of “200 Strobe Light” to the one nail of each hand without a chevron pattern outline.
Step 6 – Begin to fill in your chevron using “449C”. Make sure to coat evenly and let air dry or UV cure.
Step 7 – Take your “Gold Rush” striper polish and begin outlining another chevron pattern
above you mint triangle. Let dry.
Step 8 – Bling It! You can leave your nails as they are and apply gel at this point or add a rhinestone to the center of your chevron nails. I used purple rhinestones for this design.
Step 9 – Evenly apply gel top coat to nails. Allow nails to cure under the UV lamp for approximately 1-3 minutes.
Step 10 – When cured, spray your nails with a gel cleanser OR take a cleansing pad, apply alcohol, and wipe sticky residue off top layer of nails. Nail should appear shiny and perfected.
I hope you enjoy this look. Feel free to check out the previous tutorials for Part 1 and Part 2. You can also see my DIY nail polish wall display for some organization inspiration if you’re a polish hoarder like me!
Did you enjoy this post? If so share what colors you’ll be rocking this Spring season. I’d love to read your comments below 🙂


I did not know you could use regular polish with gel. Your mani looks great. I found you on Rekita's Blog Hop. 🙂
You sure can! Saves money and sticky mess lol. Thanks so much for coming by!